
How to Properly Wash Your Car Using a Sponge
- yinfengfoam
- Feb 10
- 5 min read
Updated: May 18

When it comes to keeping your car looking its best, few tools are as essential as a good sponge. Whether you’re a weekend warrior detailer or just trying to maintain your vehicle’s appearance, using the right sponge and proper washing technique can make all the difference. Many people start by sourcing their tools from a Car Sponge Supplier, ensuring they have high-quality, durable products that won’t scratch or damage their vehicle’s paint. In this guide, we’ll walk you through the best practices for washing your car with a sponge, covering everything from preparation to finishing touches.
Why Using a Car Sponge Matters
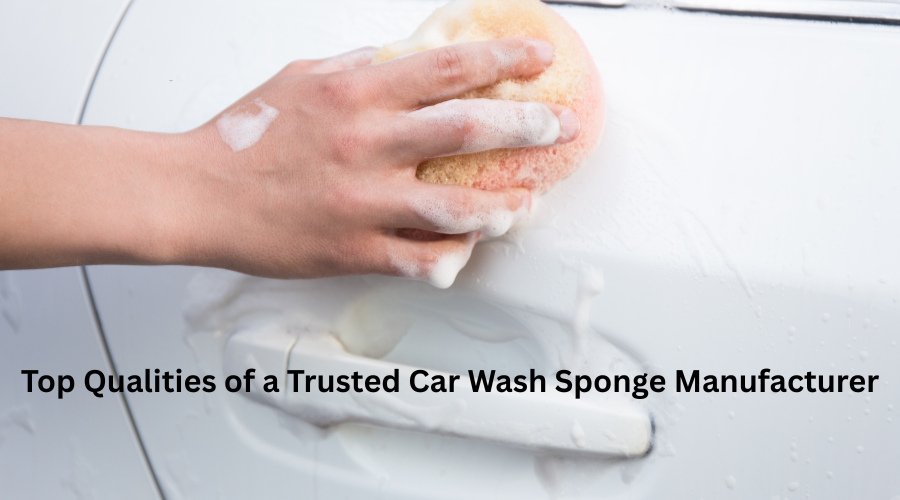
A car sponge may seem like a simple tool, but it is essential in protecting your vehicle’s paint. Unlike brushes or rags, sponges are designed to lift dirt and grime away from the surface without causing scratches. Choosing the right material—such as microfiber, foam, or PVA—is important because some sponges are better suited for delicate finishes while others excel at removing stubborn debris.
Additionally, a sponge helps evenly distribute car soap, ensuring that the cleaning solution reaches every part of the surface. This makes your wash more efficient and helps prevent streaks or water spots from forming.
Step 1: Gather Your Supplies
Before you start, make sure you have the following items ready:
Two buckets: one for soapy water, one for rinsing your sponge.
Car wash soap: specifically formulated for vehicles, not household detergents.
High-quality car sponge: preferably from a trusted Supplier of Car Sponge
Hose with spray nozzle: for gentle rinsing.
Microfiber drying towels: to finish and prevent water spots.
Using separate buckets for soap and rinse water is known as the two-bucket method. This simple step significantly lowers the chance of returning soil onto your car, which can cause micro-scratches.
Step 2: Pre-Rinse Your Car
Before applying soap, rinse your car thoroughly with water. This helps remove loose dirt, dust, and debris from the surface. By flushing away these particles first, you prevent the sponge from dragging them across the paint, which can cause scratches or swirl marks.
A good tip is to start from the top of the car and work your way down. Gravity naturally moves dirt downward, so rinsing from the roof to the wheels ensures cleaner results.
Step 3: Prepare the Soap Solution
Pour water into one bucket and add the recommended amount of car wash soap. Follow the instructions on your soap bottle carefully—too little soap won’t clean effectively, and too much can leave residue.
Dip your sponge into the soapy water, ensuring it absorbs plenty of suds. A well-soaked sponge will glide smoothly over the car’s surface, lifting dirt without scratching.
Step 4: Wash in Sections
Instead of trying to wash your entire car at once, break it into manageable sections: roof, windows, hood, trunk, sides, and wheels. Washing in sections ensures that the soap doesn’t dry on the paint, which can leave streaks or water spots.
Use gentle, straight-line motions rather than circular scrubbing. Circular motions can cause swirl marks, especially on darker-colored cars. Keep your sponge slightly damp and rinse it frequently in your rinse bucket to remove trapped dirt.

Step 5: Focus on the Wheels and Lower Areas
Wheels and lower panels often accumulate the most dirt, brake dust, and grime. You may need to use a separate sponge or brush for these areas to prevent transferring abrasive particles to the car’s paint.
When washing wheels, consider starting with a pre-soak of wheel cleaner to loosen stubborn grime. This ensures your sponge is not overloaded with debris that could scratch the vehicle.
Step 6: Rinse Thoroughly
After washing each section, rinse the soap off immediately with a gentle stream of water. Soap left to dry can leave streaks or mineral deposits, which are difficult to remove later.
Rinsing thoroughly also helps you see areas you may have missed, so you can go back with your sponge and touch up any spots.
Step 7: Drying Your Car
Once the wash is complete, use a clean microfiber towel or drying cloth to gently dry the car. Avoid letting the car air-dry, as this can lead to water spots caused by mineral deposits in tap water.
Gently pressing the towel across the surface works better than rubbing aggressively. Microfiber towels are designed to absorb water without scratching, making them ideal for finishing your wash.
Step 8: Optional Wax or Sealant
After your car is clean and dry, applying a wax or paint sealant adds protection and enhances shine. Many enthusiasts recommend a sponge to help evenly apply liquid wax before buffing with a microfiber cloth. This step isn’t mandatory, but it can prolong the life of your paint and make future washes easier.
Tips for Maintaining Your Car Sponge
Proper care of your sponge extends its life and ensures it doesn’t damage your car:
Rinse thoroughly after each use to remove dirt and soap.
Squeeze gently to wring out extra water; avoid wringing aggressively.
Allow the sponge to air-dry in a clean, ventilated area.
Change the sponge when it becomes worn or starts to break apart.
Using a well-maintained sponge guarantees smoother washes and prevents scratches caused by debris caught in worn fibers.
Common Mistakes to Avoid
Using household detergents – These can strip protective wax and damage paint.
Not rinsing the sponge often – Dirt trapped in the sponge can scratch surfaces.
Washing in direct sunlight – This causes soap to dry too quickly, leaving streaks.
Applying excessive pressure – Let the sponge and soap do the work; scrubbing hard is unnecessary.
One of the best ways to achieve a streak-free finish when washing your car with a sponge is to work on small sections at a time. Cleaning one panel before moving to the next prevents soap from drying on the surface and makes rinsing much easier. This method also allows you to pay closer attention to areas where dirt tends to collect, such as door edges, bumpers, and around side mirrors. Taking a little extra time during the washing process can significantly improve the final shine and help protect the paint from long-term damage.
FAQs
Q1: Can I use any sponge to wash my car?
Not all sponges are created equal. Look for soft, absorbent materials like microfiber, foam, or PVA, which reduce the risk of scratches.
Q2: How often should I wash my car?
For optimal care, wash your car every 2–4 weeks. More frequent washes may be needed in areas with heavy dirt, salt, or pollution.
Q3: Can I use a sponge on tinted windows?
Yes, but avoid harsh chemicals and choose a soft sponge to prevent scratches.
Q4: Should I replace my sponge regularly?
Yes. Sponges wear out over time and can trap grit, which can scratch the paint. Replacing them ensures safer, more effective washes.
Conclusion
Washing your car with a sponge may seem simple, but using the right techniques and tools can dramatically improve results. By sourcing quality sponges from a trusted Supplier of Car Sponge, using the two-bucket method, washing in sections, and drying properly, you protect your car’s paint while achieving a showroom shine. Regular care, proper sponge maintenance, and attention to detail not only enhance your car’s appearance but also extend the lifespan of its exterior. With these tips, every wash can be safe, effective, and enjoyable—turning a routine chore into a satisfying part of car ownership.


Comments